工具使用-如何使用ROS在RViz中显示Markers(python版 points and lines 示例)
Introduction
我们先来看看Marker 中定义了那些类型:
1 | rosmsg show visualization_msgs/Marker |
uint8 ARROW=0
uint8 CUBE=1
uint8 SPHERE=2
uint8 CYLINDER=3
uint8 LINE_STRIP=4
uint8 LINE_LIST=5
uint8 CUBE_LIST=6
uint8 SPHERE_LIST=7
uint8 POINTS=8% 上面声明了9种类型
uint8 TEXT_VIEW_FACING=9
uint8 MESH_RESOURCE=10
uint8 TRIANGLE_LIST=11
uint8 ADD=0
uint8 MODIFY=0
uint8 DELETE=2
uint8 DELETEALL=3
std_msgs/Header header
uint32 seq
time stamp
string frame_id
string ns
int32 id
int32 type
int32 action
geometry_msgs/Pose pose # pose包含的属性
geometry_msgs/Point position
float64 x
float64 y
float64 z
geometry_msgs/Quaternion orientation
float64 x
float64 y
float64 z
float64 w
geometry_msgs/Vector3 scale
float64 x
float64 y
float64 z
std_msgs/ColorRGBA color
float32 r
float32 g
float32 b
float32 a
duration lifetime
bool frame_locked
geometry_msgs/Point[] points # 对应一个list
float64 x
float64 y
float64 z
std_msgs/ColorRGBA[] colors
float32 r
float32 g
float32 b
float32 a
string text
string mesh_resource
bool mesh_use_embedded_materials
当type=POINTS时, points中的每一个点对应改为之上画一个点, type=LINE_STRIP时,表示poinits中任意两个相邻的点存在连线, type=LINE_LIST中的points内点不会将线连在一起,于是相邻点连线,但不存在共享定点的连线,比如第0个点和第1个点连线,第2个点和第3个点连线。
Publisher Node
1 | roscd using_markers/scripts |
points_and_lines.py的内容:
1 | #!/usr/bin/env python |
好像相对于上篇文章内容并没有添加新的东西。主要就是不同类型中points列表的设置。
Building and Viewing
1 | # ~/catkin_ws |
两个终端:
1 | rosrun using_markers points_and_lines.py |
1 | rosrun rviz rviz |
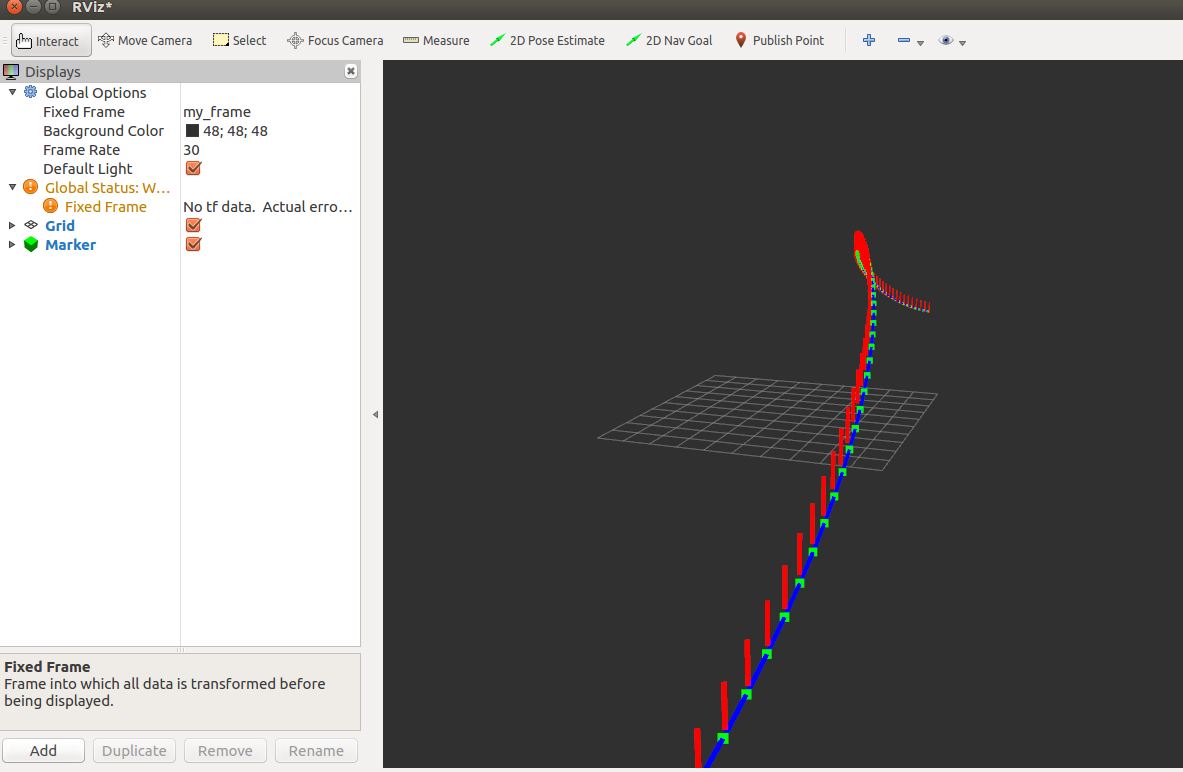
然后在rviz的左边栏将Fixed Frame 值改为 /my_frame
左下角添加Add msg的类型Marker, 然后就能看到结果了。
本文作者 : zhouzongwei
原文链接 : http://yoursite.com/2019/06/26/rviz-points-and-lines/
版权声明 : 本博客所有文章除特别声明外,均采用 CC BY-NC-SA 4.0 许可协议。转载请注明出处!
知识 & 情怀 | 赏或者不赏,我都在这,不声不响